Slow Cooker Carnitas

This recipe graciously stolen from Sarah Kate Gillingham at The Kitchn.

(Picture to come.)

The Goods
1 (6- to 8-pound) pork shoulder, boneless or not
2 tablespoons coarse salt
1 tablespoon ground cumin
1 tablespoon freshly ground black pepper
1 tablespoon dried oregano
1 tablespoon garlic powder
2 teaspoons ground cinnamon
1 teaspoon cayenne pepper
4 chipotle peppers (dried)
1/2 cup tomato juice
2 1/2 cups orange juice

The Gettin’
1.  Combine all of the ingredients in a slow cooker and cook on the lowest setting you have time for (at least 8 hours, 10 is ideal.)  If your shoulder had a bone, it should literally fall off the bone when it’s time.
2.  While it’s cooking, you don’t really want it to boil, so should you see some intense boiling action, just crack open the lid a little bit.  Pork shoulder is a hardy piece of meat, so don’t fret over it.  🙂
3.  When it’s finished cooking, shred the meat!  Again, it should be very easy to do so after cooking for so long.

The Take
These are good!  I love carnitas, so I appreciate having an easy, low-prep recipe for them where all I have to do is combine some ingredients in a slow cooker.  For my money, the other carnitas recipe on this site is better, but sometimes you just don’t have the time or want to expend the effort. 🙂


Total Time:
  10 hrs 15 minutes (all but 15 min inactive)
Prep – 15 minutes
Yield:  18 to 24 servings of carnitas

Level: Easy

Jordan’s Delectable Slow-Cooker Pot Roast

This recipe created masterfully by Jordan.

The Goods
1 beef roast (often advertised as pot roast, any size that will fit in your slow cooker)
1 lb carrots, peeled
1 container mushrooms, washed
1 or 2 onions, sliced
1 tbsp garlic powder
1 tbsp oregano
1 bottle of red wine you’d like to drink
salt and pepper
olive oil for searing

The Gettin’
1. Liberally salt and pepper both sides of roast.  If you have time, wait a bit for the salt to get into the meat, about 30 minutes.  No big deal if you can’t.
2. Sear the roast on both sides in frying pan on medium-high heat with olive oil. (It doesn’t keep the moisture in, but it does make a nice brown “crust.”)  After the roast is nice and brown on all sides, place it into the slow cooker.
3. There should be some tasty bits and juice left in your frying pan.  Place your carrots in the pan and soften them up a little bit on medium-high.  When they look a little brown/softer, place them into the slow cooker.  (No need to overdo it.)
4. Do the same with the mushrooms and onions.  Cook ’em a little in the tasty juice, and then place into the slow cooker.
5. Liberally salt and pepper the ingredients in the slow cooker.  You can also add the garlic powder and oregano at this time.
6. Pour about 3/4 of the bottle of wine into the slow cooker.  Save the remaining 1/4 to apply to the cook as needed.
7.  Cook for at least 8 hours, covered, on the low or very low setting.  The longer, the better.  Keep an eye on the slow cooker every so often – even on low settings it will tend to boil – just crack the lid open to cool it off if you see this.  Again, don’t fret over it.
8. Kiss the cook (Lauren’s suggestion).

The Take:
A pot roast is a wonderful thing, and a pot roast recipe is delightfully flexible.  Want a different vegetable?  Cool.  You’d rather use stock instead of wine?  Fine.  Adapt it however you see fit – all you need is the meat, something to cook it in and something to cook it with!

Total Time: 8 hrs 20 minutes – 10 hrs 20 minutes (all but 20 min inactive)
Prep – 20 minutes
Cook– 6-8 hours

Yield: 8 servings

Level: Easy

Peanut Butter Caramel Crisps

This recipe graciously stolen from Everyday Grain-Free Gourmet, written by Jodi Bager and Jenny Lass.

(Picture to come.)

The Goods
Bottom Layer of Candy:
1/4 cup unsweetened peanut butter
2 Tbsp butter, melted
1/4 cup honey

Top Layer of Candy:
1 cup honey
2 Tbsp butter
1 cup cashew, almond, or peanut butter (I encourage you to try and use cashew or almond if you can!)

The Gettin’
1.  Let’s make the bottom layer first!  Line a baking sheet with parchment paper.
2.  Mix all of the bottom layer ingredients until well-combined.
3.  Spread the mixture on the prepared baking sheet – not too thick (about 1/4 in.).
4.  Now the top layer!  Pour the honey into a medium-sized pot and boil on low to medium-low heat until it reaches 300° F.  (You’ll need a thermometer.)  If you don’t have one (you really should!), 8 or so minutes should be enough – the honey should turn a healthy brown color.  Make sure to stir the honey as it boils.
5.  Turn the heat off, but keep the pot on the burner.  Add the cup of nut butter and the butter and mix thoroughly.
6.  Quickly, now, pour the mixture over the bottom layer until it’s completely covered.  Use a spatula to spread it evenly.  If the mixture becomes too stiff, just reheat it.
7.  Let it cool for a bit (15 min?) and place the sheet in the refridgerator until the candy is nice and crunchy!
8.  Subtly break off pieces to enjoy and blame your spouse as the candy shrinks.

The Take
Another excellent recipe from Everyday Grain-Free Gourmet!  This has become my go-to peanut butter sweets recipe.  As the original authors state, this candy reminds you of a certain crispety-crunchity candy you might also enjoy!


Total Time:
  25 minutes
Prep – 15 minutes
Yield:  1 cookie sheet worth of candy

Level: Intermediate


Wright’s Walleye Breading

This recipe graciously stolen from Steven Wright at scdlifestyle.com.

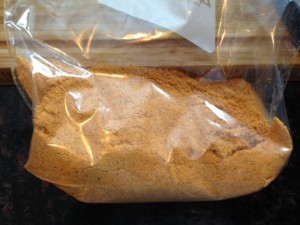
breading

The Goods
3 cups almond flour
2 tablespoons paprika
2 tablespoons sea salt
2 tablespoons fresh ground pepper
2 tablespoon garlic powder
1 tablespoon cayenne pepper

The Gettin’
1.  Mix together thoroughly.

The Take
A great breading for your fish craving!  We’ve tried it on tilapia and mahi mahi.  Just enough heat, and great with tartar sauce!  Yum!

Total Time:  5 minutes
Prep – 5 minutes

Yield:  3 1/2 cups breading

Level: Easy

Key Lime Pie

This recipe graciously stolen from Amber at The Tasty Alternative.

(Picture to come.)

The Goods
SCD Pie Crust
1 can SCD legal coconut milk 
1/3 cup honey
3/4 cup fresh squeezed lime juice
1 ripe avocado
2 1/2 teaspoons gelatin (.25 ounces) or 1 envelope of Knox gelatin

The Gettin’
1.  To a food processor add: lime juice, honey and avocado.  Blend until well incorporated.
2.  In a bowl,  add 1/3 cup of room temperature coconut milk and mix in the gelatin and allow the gelatin to “bloom.” 3.  Slowly heat the remaining coconut milk on the stove top (do not boil).
4.  Remove the pan from stove top and add the gelatin mixture into the pan and whisk with the heated coconut milk. 5.  Pour the coconut milk mixture into the food processor and blend for 10 seconds.
6.  Pour mixture into a 9″ pie dish (with the crust already in place) and place in refrigerator for at least 8 hours.
7.  After the mixture has set, top with whipped lemon coconut cream (below) and return to the refrigerator for an additional 2 to 4 hours.

Whipped Lemon Coconut Cream:
Cream from 1 can of coconut milk
3 tablespoons honey
1 teaspoon vanilla
1/2 teaspoon lemon flavor

1.  To a  bowl add the honey, vanilla and lemon flavor.  Mix.
2.  Scoop out the coconut cream and add to the bowl.
3.  Mix on high with hand-held mixer until well incorporated.
4.  Quickly top pie and place back in the refrigerator for 2 to 4 hours.

The Take
You wouldn’t believe a pie recipe containing avocado would taste so much like the real thing!  Not only does the avocado add a fullness of texture and flavor, it contributes the familiar green color to the recipe.  My go-to pie of choice.

Total Time:  10 hours 50 minutes
Prep – 50 minutes
Refrigerate  – 10 hours

Yield:  1 pie

Level: Easy

SCD Pie Crust

This recipe graciously stolen from Grain-Free Gourmet, written by Jodi Bager and Jenny Lass.

The Goods
3 cups almond flour
1/3 cup butter, cold and cut into pieces
2 Tbsp honey
1/2 tsp salt
1/4 tsp baking soda

The Gettin’
1. Heat the oven to 300° F.
2.  Process all the crust ingredients in a food processor until the mixture starts to form a ball.  The butter may still be visible in the dough.
3.  Flatten the dough into a round disk between two large pieces of plastic wrap, and gently roll the crust out to a 13-inch round.  Put the dough, still between the plastic wrap, on a baking sheet, and chill in the fridge until firm, approximately 10 minutes.
4.  Remove the crust from the fridge.  Working quickly, peel off one side of the the plastic wrap.  Invert the crust into the pie plate and remove the remaining plastic wrap.  Cut off the dough that overhangs the pie plate and eat it save it for the pie topping.
5.  If presentation is important, decoratively crimp the cut edges of the dough. If there are any holes or tears, just pinch them together.
6.  If serving a pie that will be baked, bake for 15-20 minutes until just beginning to brown.  If serving a pie that will be served cold, bake for 30-35 minutes until brown to your liking.

The Take
This is another hit from Jodi Bager and Jenny Lass’s hit cookbook Grain-Free Gourmet.  Seriously – go buy it already!  We use this recipe as the crust for all of our pies.

Total Time:  25 to 55 minutes
Prep – 10 minutes
Cook  – 15 to 45 minutes (see recipe)

Yield:  1 pie crust

Level: Easy

SCD Tartar Sauce

This recipe graciously stolen from Ina Garten.

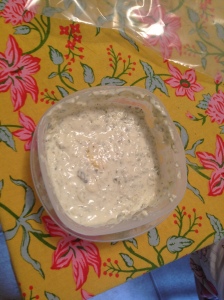
photo(4)

The Goods
1/2 cup SCD mayonnaise
2 tablespoons small-diced pickles
1 tablespoon Champagne or white wine vinegar
1 tablespoon capers
1 teaspoon coarse-grained mustard
Pinch kosher salt
Pinch freshly ground black pepper

The Gettin’
1. Place all the ingredients in a food processor or mini chopper fitted with a steel blade and pulse several times until the pickles are finely chopped and all the ingredients are well mixed but not pureed.

The Take
This is a wonderful, fresh tartar sauce that tastes just like the real thing.  Perfect with seafood!

Total Time:  10 minutes
Prep –10 minutes

Yield:  about 1/2 cup of tartar sauce

Level: Easy

SCD Mayonnaise

This recipe graciously stolen from Everyday Grain-Free Gourmet, written by Jodi Bager and Jenny Lass.

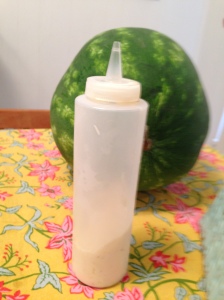
photo(3)

The Goods
1 large egg
1 tsp white vinegar
1 tsp Dijon mustard
1 pinch of salt
1 pinch of black pepper
1 cup sunflower oil

The Gettin’
1.  Place the egg, vinegar, mustard, salt and pepper in a food processor or standing blender.
2.  With the machine running on high, slowly drizzle in the oil.  How slowly?  You should take at least 60 seconds!
3.  If the resulting mayo is too thin for your liking, add more oil.

The Take
We have previously featured the Grain-Free Gourmet books here on Recipe Thieves, but this is the first recipe from the book that we’ve shared!  We emailed Jodi and Jenny, and they graciously allowed us to share their excellent mayonnaise recipe!  Tastes just like the real thing – perhaps, because it is!

Total Time:  10 minutes
Prep   10 minutes
Cook –
none

Yield:  About 1 cup mayonnaise

Level: Intermediate

Probiotic Lemonade!

This recipe graciously stolen from the Food Renegade.

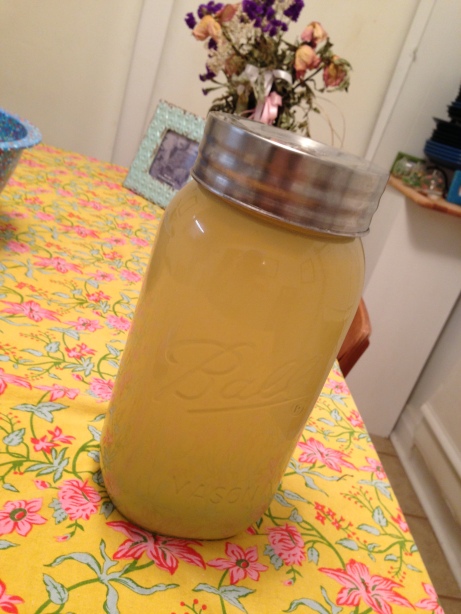
photo(2)

The Goods
juice of 12 lemons
1/2 cup honey, preferably light colored
1 cup of whey (the liquid drained off of yogurt)

The Gettin’
1.  Put all ingredients into a gallon sized container.  Top off with water (distilled might be best; we actually like the taste of ours better with tap water.)  Mix thoroughly and cover tightly with a lid.
2.  Keep at room temperature for 48 hours.
3.  Depending on how humid your climate is, some amount of yeast and/or mold could form.  Don’t worry about it – just filter the finished product through some coffee filters.
4.  Make sure to refrigerate after filtering, and enjoy!

The Take
I am someone who by and large is satisfied to drink water all the time.  Occasionally, though, I get the craving for a tart, cold lemonade.  This recipe delivers exactly what I’m looking for and has the added benefit of having beneficial live bacteria!  Should you not care about the probiotic benefit, you may omit the whey – however, the final product will be sweeter due to the absence of bacteria.

Total Time:  2 days 15 minutes
Prep –15 minutes
Cook (sitting time)
– 2 days

Yield:  1 gallon

Level: Easy

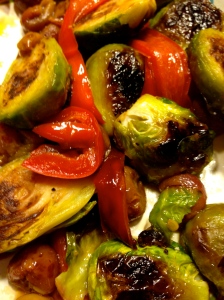
Bejeweled Brussels

This recipe graciously stolen for inspiration from GlutenFreeHappyTummy.

-4

The Goods
About 15 brussels sprouts, halved
1 red pepper sliced
60 grapes

The Gettin’
1. Preheat oven to 400 degrees. Place your red pepper slices in a  mixing bowl and stir with olive oil. (Don’t season with salt and pepper yet.)
2. Then place oiled pepper slices on baking sheet that’s been lined with tin foil and drizzled olive oil.
3. Roast for 30 minutes, flipping once at 15 minutes. When you flip them after 15 minutes, add the grapes to the sheet and bake them with the peppers for the remaining 15 minutes.
4. While they are roasting, cook your brussel sprouts with olive oil cut side down in a single layer of a large skillet. Let them sit and form a crust for about 4 minutes. Flip and let the other side brown. Finish sprouts with generous salt and pepper!
5. Mix the sprouts with the red peppers and grapes!

The Take
Seriously, you will not believe your mouth!  MY FRIENDS, IT DOES NOT MATTER IF YOU LIKE BRUSSEL SPROUTS OR NOT! This vegetable side is intricately balanced in flavor, a perfect fresh and sweet combination! There is a great sweetness added to the brussel sprouts that made the sprout haters at the table go gaga!  Everyone at the table agreed that this side was heavenly! Recommending to anyone? Yes, yes we are…

Total Time:  50 minutes
Prep –5 minutes
Cook
– 45 minutes

Yield:  4 servings

Level: Easy